Difference between revisions of "Linear 2D Designer"
| Line 1: | Line 1: | ||
==Description== | ==Description== | ||
| − | [[File:lin2d.png|right| | + | [[File:lin2d.png|right|500px]]The Linear 2D Designer allows parts to be created on a two dimensional plane. These kind of parts can have either no rotation or 180° rotations on bends. Parts can be designed by clicking directly on the part display and drawing out each length or by giving the straight length and angle values in the design panel. In other words, parts made in this designer will be flat, two dimensional parts. |
| + | |||
| + | |||
| + | |||
| + | |||
| + | |||
| + | |||
| + | |||
| + | |||
| + | |||
==How To== | ==How To== | ||
===Start Up=== | ===Start Up=== | ||
| − | To access this designer, click the [[File:Lin2dicon.png]] icon on the start up page. This will open up a new, blank part design. | + | To access this designer, click the linear 2D designer[[File:Lin2dicon.png]] icon on the start up page. This will open up a new, blank part design. |
| − | ===Design=== | + | ===Part Design=== |
Once a new linear 2D design window has been opened, a new part can be created. | Once a new linear 2D design window has been opened, a new part can be created. | ||
| Line 56: | Line 65: | ||
These can be edited at any point in the design process. The lengths and angles can be changed by entering new values in the text fields. To add a 180° rotation, check the box in the rotation column next to the bend where the rotation will occur. | These can be edited at any point in the design process. The lengths and angles can be changed by entering new values in the text fields. To add a 180° rotation, check the box in the rotation column next to the bend where the rotation will occur. | ||
| + | |||
| + | ===Part Design Controls and Options=== | ||
To completely start over and delete the whole part design, click the start over button [[File:startover.png]]. | To completely start over and delete the whole part design, click the start over button [[File:startover.png]]. | ||
Revision as of 11:03, 21 May 2013
Description
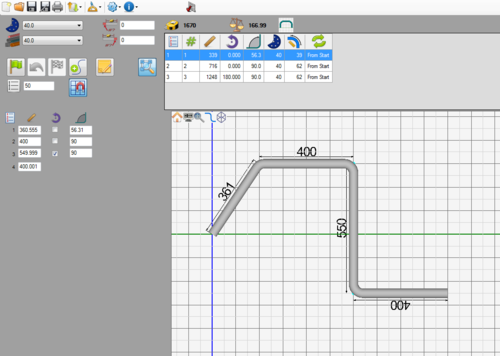
The Linear 2D Designer allows parts to be created on a two dimensional plane. These kind of parts can have either no rotation or 180° rotations on bends. Parts can be designed by clicking directly on the part display and drawing out each length or by giving the straight length and angle values in the design panel. In other words, parts made in this designer will be flat, two dimensional parts.
How To
Start Up
To access this designer, click the linear 2D designer![]() icon on the start up page. This will open up a new, blank part design.
icon on the start up page. This will open up a new, blank part design.
Part Design
Once a new linear 2D design window has been opened, a new part can be created.
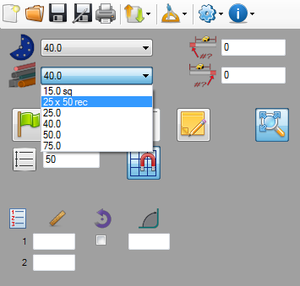
First, a die and material should be chosen. This can be done by clicking on the drop down menus next to the die and material icons in the top left corner of the screen.
Next, the part can be designed using one of the two different methods: typing in values and/or drawing out the part lengths in the part display.
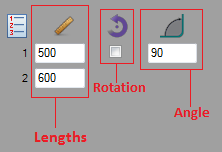
The first column below the ruler icon represents the straight lengths of tube. The second column below the arrow icon holds a row of check boxes. When a box is checked, that bend will be rotated 180°. The third column below the angle icon represents the angle of each bend.
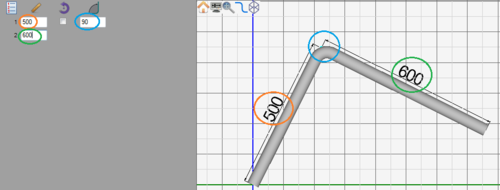
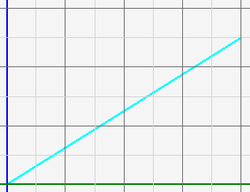
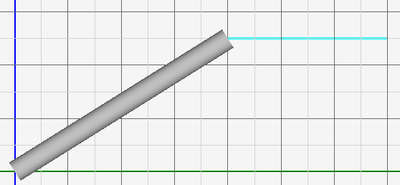
To design a part by drawing it out, start by clicking directly on the part display where the first length of the part will begin. Once this point is clicked, a light blue line will be connected to this point(As shown to the right).
As new lengths and bends are drawn, the lengths, rotations, and values will be generated in the columns on the left of the screen. Each bend and the last straight length will have its own row.
These can be edited at any point in the design process. The lengths and angles can be changed by entering new values in the text fields. To add a 180° rotation, check the box in the rotation column next to the bend where the rotation will occur.
Part Design Controls and Options
To completely start over and delete the whole part design, click the start over button ![]() .
.
To undo the last straight length of tube, click the undo button ![]() .
.
To stop designing a part, click the checkered flag button ![]() .
.
To add more bends after the design session has been stopped (After the checkered flag button has been clicked), click the add bend button ![]() . This will start up the design session again and more bends can be added.
. This will start up the design session again and more bends can be added.
The grid overlay in the part display can be turned on or off using the grid button ![]() . While the grid is on/activated, the start and end points of the part will be snapped to this grid during the design process. The size of each grid cell can be adjusted by changing the number given in the grid size field
. While the grid is on/activated, the start and end points of the part will be snapped to this grid during the design process. The size of each grid cell can be adjusted by changing the number given in the grid size field ![]() .
.
Notes can be attached to the part design project using the note button ![]() .
.
The auto-zoom option can be turned on or off using the auto-zoom button ![]() . When activated, auto-zoom will zoom in or out to accommodate the size of the part. For example, if a length is originally 200 and is changed to 2000, it may extend past the part display's extend. Auto-zoom will zoom out to make sure the whole part is visible.
. When activated, auto-zoom will zoom in or out to accommodate the size of the part. For example, if a length is originally 200 and is changed to 2000, it may extend past the part display's extend. Auto-zoom will zoom out to make sure the whole part is visible.
