Difference between revisions of "Material Library"
| Line 26: | Line 26: | ||
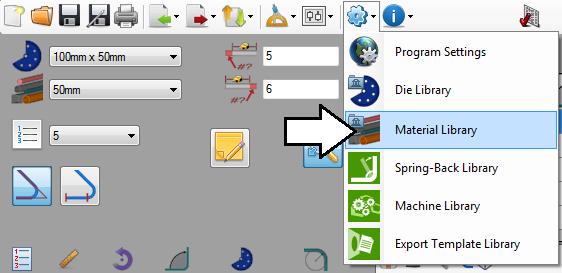
'''To access the material library''', click the settings menu on the main tool bar. Click the material library option in the drop down menu, as shown below. | '''To access the material library''', click the settings menu on the main tool bar. Click the material library option in the drop down menu, as shown below. | ||
| − | [[File:matlib02.png| | + | [[File:matlib02.png|500px]] |
Revision as of 12:01, 20 August 2013
Contents
Description
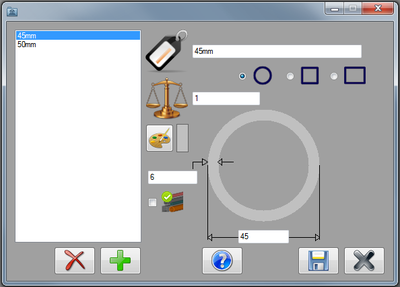
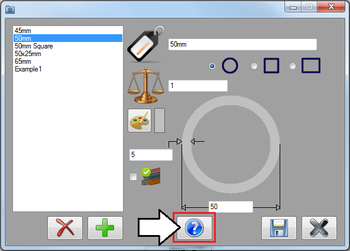
The material library holds all the materials available to create parts. Each material is given a set of attributes: the diameter, wall thickness, name, shape of the material, its weight, and a color.In the material library window, there is a list of all the materials on the left. To the right, the currently selected material's attributes will be displayed. The control buttons are along the bottom edge of the window.
How To
Start Up
To access the material library, click the settings menu on the main tool bar. Click the material library option in the drop down menu, as shown below.
Attributes
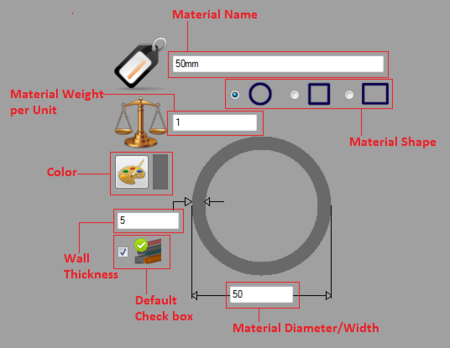
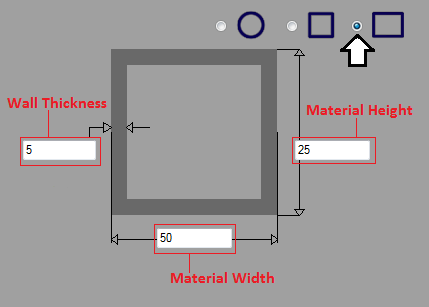
Each material is defined by a set of attributes. If the material shape is rectangular, there will be an extra field to fill in. See images below.
Note: In the weight, height, wall thickness, or diameter fields, only enter numerical values. Do not supply units in these fields.
- Material Name: The name given to the material will be what the material is referred to as throughout the software.
- Material Shape: Materials can be circular, square, or rectangular.
- Material Weight: The number supplied here is how much the material weighs per unit (Ex: per millimeter, inch, etc.). This attribute is optional - if unknown, enter 0.
- Color: The color of the material will be used wherever the material is represented graphically (Ex: part display, simulation, part verify, etc.)
- Wall Thickness: The width of the material wall.
- Material Diameter: The diameter of the tube. The diameter is measured straight across from the outside edges of the tube
- Material Height: Only for rectangular tube. The height of the material.
- Default: When this box is checked, the material will be set as the default material. Whenever a designer is opened, the default material will be automatically chosen in the material selection menu.
Add
To add a material to the library, click the add button. ![]() After the add button is clicked, all the fields will be cleared. Enter all the information, and choose a material shape and color. Once all these attributes are supplied, the save button will become clickable. Click the save button
After the add button is clicked, all the fields will be cleared. Enter all the information, and choose a material shape and color. Once all these attributes are supplied, the save button will become clickable. Click the save button ![]() to add the material to the library.
to add the material to the library.
Edit
To edit a material, first select the material by clicking on it in the material list. Change any of the attributes and options to the right. Once the information has been filled in, click the save button ![]() to save the changes made.
to save the changes made.
Remove
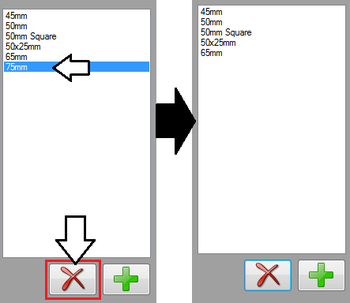
To remove a material from the library, first select the material by clicking on it in the material list. Click the delete button ![]() to delete it.
to delete it.
Help Videos
Below the material attribute fields, there will be a blue question mark button.
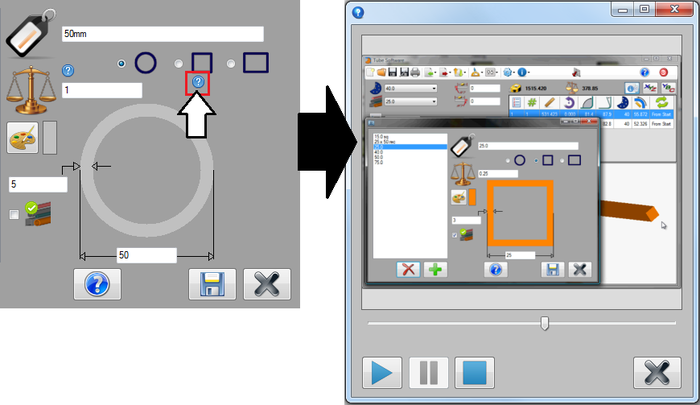
Click on any of these help icons to watch help videos that will visually explain a certain attribute or option. See image below. Use the play, pause and stop buttons in the bottom left corner of the window to control the video. Click the grey X button ![]() to close the video.
to close the video.
