Difference between revisions of "Bump Bending"
| Line 42: | Line 42: | ||
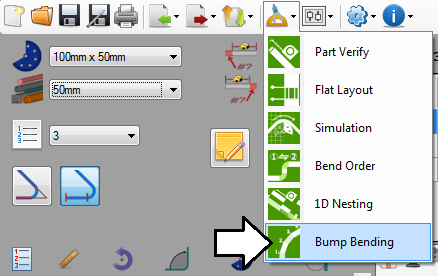
'''To access the bump bending''' plug-in, click the tools menu in the main menu bar. Choose the bump bending option from the drop down menu. | '''To access the bump bending''' plug-in, click the tools menu in the main menu bar. Choose the bump bending option from the drop down menu. | ||
| − | [[File:bumpbend01.png | + | [[File:bumpbend01.png]] |
Latest revision as of 12:08, 20 August 2013
Description
The bump bending plug-in allows bends to be sectioned off into multiple smaller, equal sized bends. When adding a series of bump bends to a bend, a die is chosen along with the bend and the number of bump bends that will be used to create the full bend. This is typically used with bends that have very large radii. This function helps break these kind of bends down into more manageable bends.
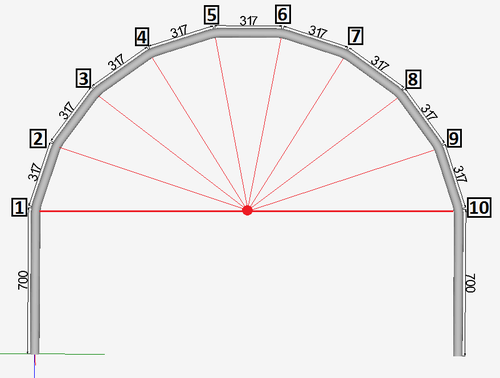
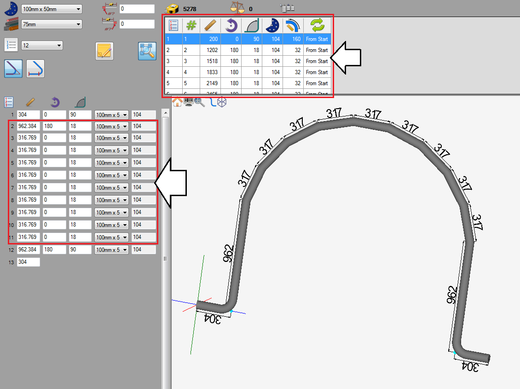
In the example to the right, a 180° bend with a CLR of 1000mm is split into ten 18° bump bends with 200mm CLRs.
How To
Add Bump Bends
To use the bump bend plug-in, first design the part normally. The part needs to be designed before the bump bends are added.
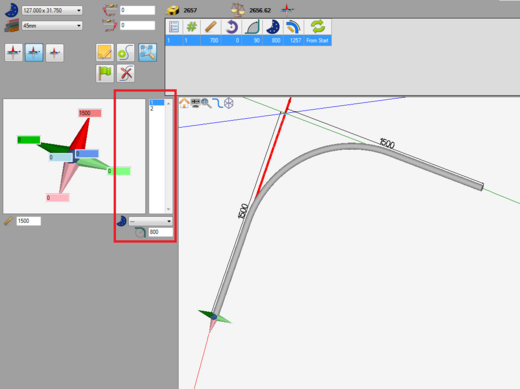
Design the bends that will be sectioned off into smaller bends normally by applying a die to the bend or by giving it a custom CLR.
Once the part design is complete (or at least the bend that will have the bump bends added to it is complete) , open the bump bend plug in.
To access the bump bending plug-in, click the tools menu in the main menu bar. Choose the bump bending option from the drop down menu.
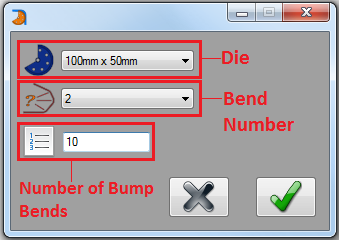
A message box will open where the die, bend, and number of bump bends can be chosen.
- Die: This die will be used to perform each individual bump bend. This die will have a smaller CLR than the full CLR of the bend. Choose a new die by clicking the drop down menu and choosing a die from the list.
- Bend Number: The bend number refers to the bend that will be sectioned off into the smaller bump bends. Choose a new bend by clicking the drop down menu and choosing a bend number from the list.
- Number of Bump Bends: This value determines how many bump bends will be used to create the larger bend. To change the number of bump bends, enter a value into this field. (Note: The number of bump bends is limited to 50.)
Click the green check button ![]() to confirm and finalize the die, bend number, and the number of bump bends.
to confirm and finalize the die, bend number, and the number of bump bends.
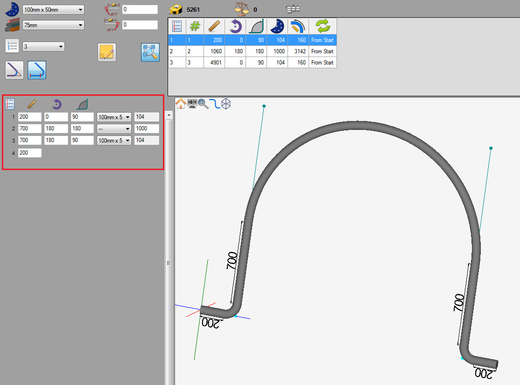
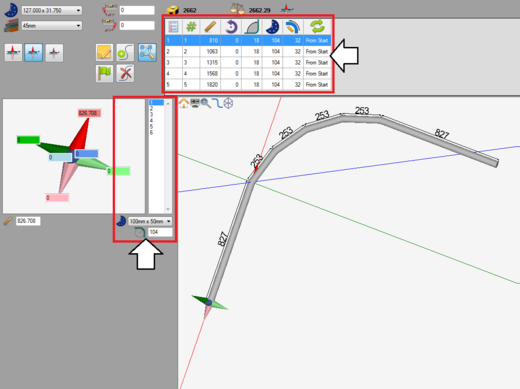
The bump bends will be added to the part' and generated in the entry fields and the results table at the top. See image below. Once the bump bends are added, they can be adjusted just like any other bend.
