Difference between revisions of "Linear Dynamic Designer Quick Start"
(Created page with "=='''Add Bend'''== '''Adding a bend''' can be done two different ways: '''1.)''' By '''clicking the green plus''' symbol at the end of the part. [[File:ldaddbend1.png|300px]...") |
|||
| Line 25: | Line 25: | ||
[[File:ldadjustlength.png|350px]] | [[File:ldadjustlength.png|350px]] | ||
| + | |||
'''2.)''' By '''clicking on the blue ring''' and the end of the straight length and '''keying in''' the length value. | '''2.)''' By '''clicking on the blue ring''' and the end of the straight length and '''keying in''' the length value. | ||
| + | |||
'''3.)''' By '''entering a value''' into the length field on the left panel. | '''3.)''' By '''entering a value''' into the length field on the left panel. | ||
| Line 41: | Line 43: | ||
[[File:ldadjustangle1.png|350px]] | [[File:ldadjustangle1.png|350px]] | ||
| + | |||
'''2.)''' By '''clicking on the pink ring''' and '''keying in''' the angle value. | '''2.)''' By '''clicking on the pink ring''' and '''keying in''' the angle value. | ||
| + | |||
'''3.)''' By '''entering a value''' in the angle field in the left panel. | '''3.)''' By '''entering a value''' in the angle field in the left panel. | ||
| − | [[File: | + | [[File:ldadjustangle2.png]] |
=='''Adjust Rotation'''== | =='''Adjust Rotation'''== | ||
| + | The '''rotation can be adjusted''' using any of the 3 following methods: | ||
| + | |||
| + | '''1.)''' By '''clicking the green ring and dragging''' it around to rotate the following bend(s). | ||
| + | |||
| + | [[File:ldadjustrot1.png|350px]] | ||
| + | |||
| + | '''2.)''' By '''clicking the green ring''' and '''keying in''' the rotation value. | ||
| + | |||
| + | '''3.)''' By '''entering a value''' into the rotation field in the left panel. | ||
| + | |||
| + | [[File:ldadjustrot2.png]] | ||
| + | |||
| + | |||
| + | |||
=='''Dimension Types'''== | =='''Dimension Types'''== | ||
| + | The way the straight lengths part dimensions are measured can be changed using the dimension buttons. Click on either '''distance to apex''' [[File:apex.png]] or '''length of straight''' [[File:strlen.png]] to set the dimension type. | ||
| + | |||
| + | [[File:distApex.png|250px]] [[File:StraightLength.png|250px]] | ||
=='''Start Over'''== | =='''Start Over'''== | ||
=='''180° Bends'''== | =='''180° Bends'''== | ||
Revision as of 11:35, 28 May 2013
Contents
Add Bend
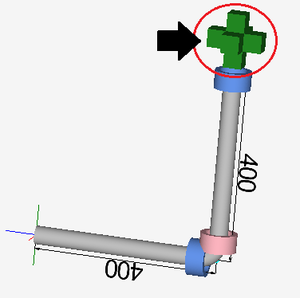
Adding a bend can be done two different ways:
1.) By clicking the green plus symbol at the end of the part.
2.) By clicking the add bend button. ![]()
Remove Bend
To remove the last bend added to the part, click the delete bend button. ![]()
Adjust Lengths
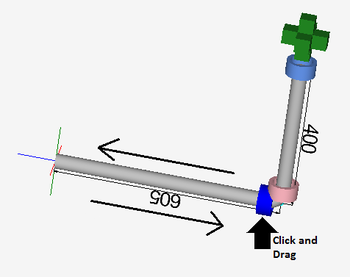
The length can be adjusted using any of the 3 following methods:
1.) By clicking the blue ring at the end of the straight length and dragging it to the correct length.
2.) By clicking on the blue ring and the end of the straight length and keying in the length value.
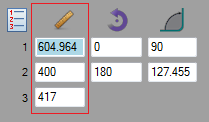
3.) By entering a value into the length field on the left panel.
Adjust Angles
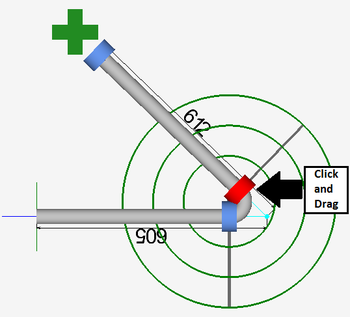
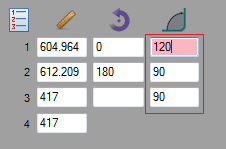
The angle of a bend can be adjusted using any of the 3 following methods:
1.) By clicking and dragging the pink ring to the correct angle.
2.) By clicking on the pink ring and keying in the angle value.
3.) By entering a value in the angle field in the left panel.
Adjust Rotation
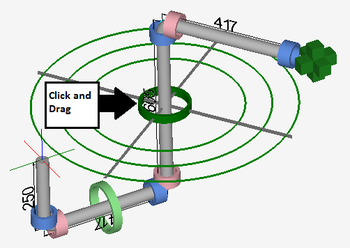
The rotation can be adjusted using any of the 3 following methods:
1.) By clicking the green ring and dragging it around to rotate the following bend(s).
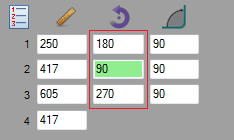
2.) By clicking the green ring and keying in the rotation value.
3.) By entering a value into the rotation field in the left panel.
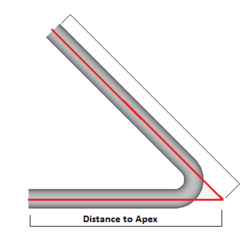
Dimension Types
The way the straight lengths part dimensions are measured can be changed using the dimension buttons. Click on either distance to apex ![]() or length of straight
or length of straight ![]() to set the dimension type.
to set the dimension type.
