Difference between revisions of "Custom CLR"
| Line 10: | Line 10: | ||
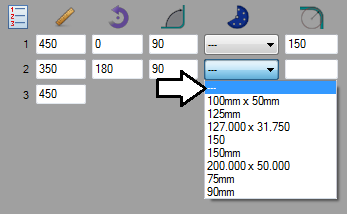
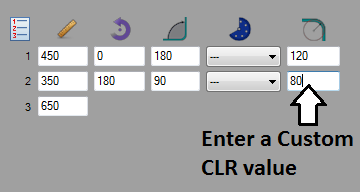
'''To add a custom CLR to a part''', first click the individual bend's die drop down menu and select the "---" option at the top. Once this option is chosen, the field to the right below the CLR icon will be available to type in. Enter a custom CLR value into this field. | '''To add a custom CLR to a part''', first click the individual bend's die drop down menu and select the "---" option at the top. Once this option is chosen, the field to the right below the CLR icon will be available to type in. Enter a custom CLR value into this field. | ||
| − | [[File:customclr01.png]] | + | [[File:customclr01.png]] [[File:customclr03.png]] |
Revision as of 13:53, 12 June 2013
Description
The custom CLR plug-in allows a custom CLR value to be applied to a bend. If a certain die CLR is not available in the die library, this function can be used to simulate the needed CLR value. Applying a custom CLR is just like adding a different die to a single bend and has the same effect, but a CLR value is entered instead.
How To
Add a Custom CLR
To add a custom CLR to a part, first click the individual bend's die drop down menu and select the "---" option at the top. Once this option is chosen, the field to the right below the CLR icon will be available to type in. Enter a custom CLR value into this field.
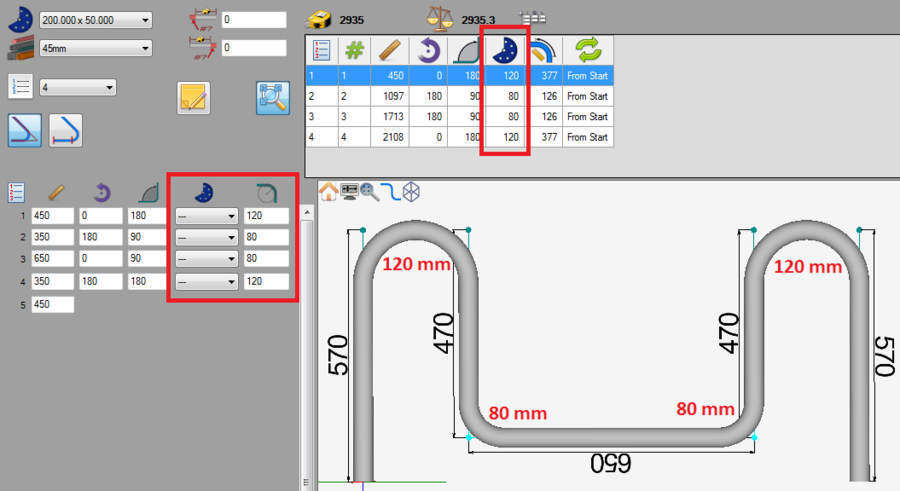
The given CLR value will be applied to the part model in the part display and will be included in the bend chart at the top of the designer frame.


