Harpoon Designer Quick Start
Contents
Add Bend
Adding a bend can be done two different ways:
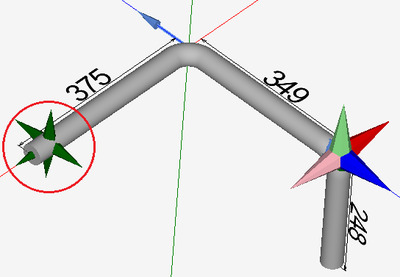
1.) By hovering the mouse over the end of the part, and when the green harpoon shape appears, double click on it.
2.) By clicking the add bend button. ![]()
Remove Bend
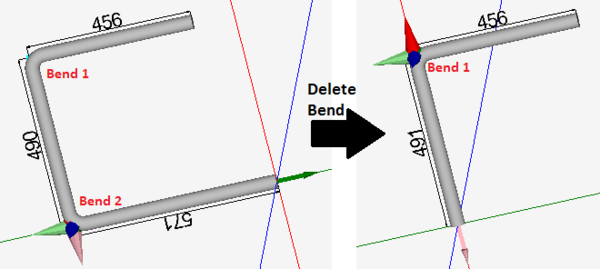
To remove the last bend added to the part, click the delete bend button. ![]()
Select a Bend
Selecting a bend can be done two different ways.
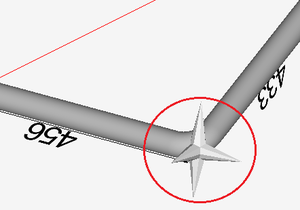
1.) By double clicking directly on the bend in the part display. When the mouse is hovering over the bend, a grey harpoon shape will be shown, as seen to the right. Double clicking will select the bend.
2.) By clicking on the bend number in the bend list on the left panel.
Adjust Lengths
Before adjusting the length, select the bend before the straight length.
The length can be adjusted using any of the 3 following methods:
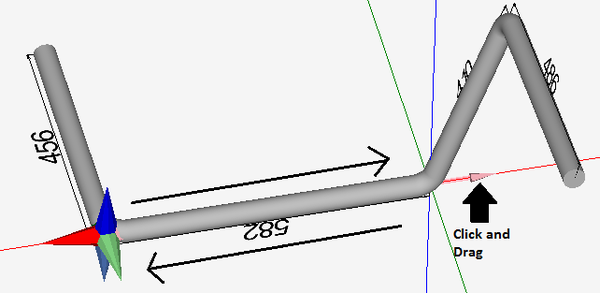
1.) By clicking and dragging the harpoon point in the direction of the tube.
2.) By clicking the harpoon point or by clicking and dragging the harpoon point in the direction of the tube and directly keying in a value.
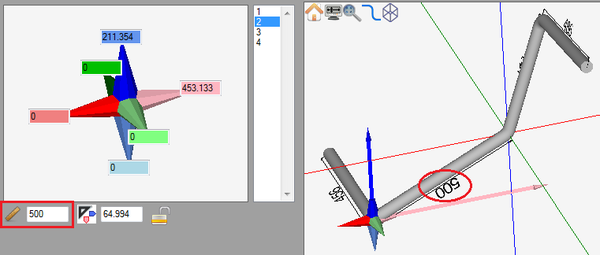
3.) By entering a value into the length field on the left panel.
Adjust Angles
As the part is being designed, the angles are generated automatically.
Using any of the following design methods will affect the angle of the part's bends.
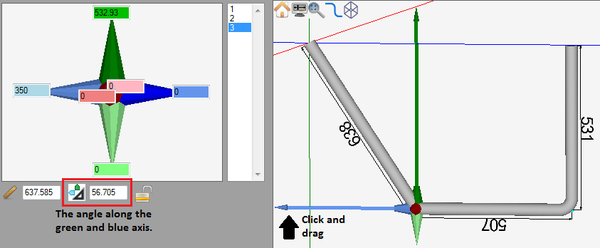
1.) By clicking and dragging the harpoon point in the direction of the angle.
2.) By clicking the harpoon point or by clicking and dragging the harpoon point in the direction of the angle and directly keying in the moving distance.
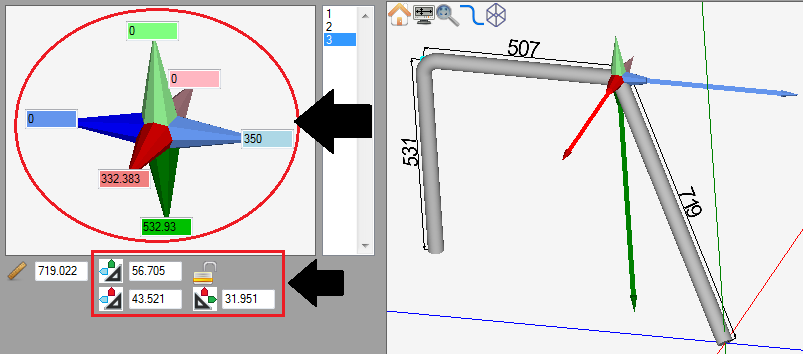
3.) By entering new values into any of the distance or angle entry fields in the left panel. The values in the angle fields represent the angle of the current part length along the specified axis, not the actual angle of the bend.
