Export Tutorial
Introduction
This tutorial will step through the process of exporting a part to a file using the export plug-in. Parts can be exported to .step/.stp, .iges/.igs, .brep, or .csv files. In this tutorial, the part will be exported to a .step file.
Tutorial
Note
Before starting the tutorial, a part must be completed. This tutorial will be using the part that was created in the Linear 2D Designer Tutorial.
Step 1
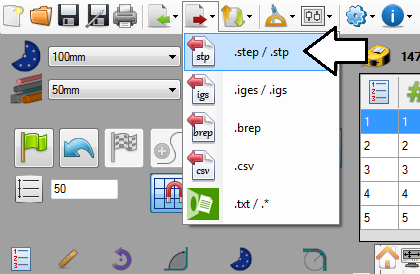
Once the part is complete, go up to the main menu bar, click the export menu, and select the .step/.stp option.
Step 2
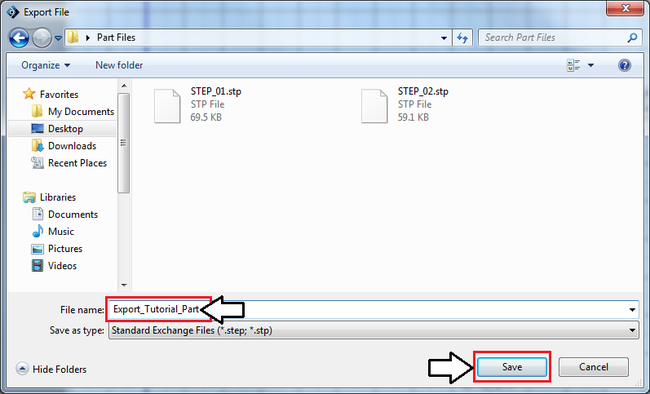
In the export file window, choose a location for the part. Then give the file a name. Call it "Export_Tutorial_Part". Click the save button to export the part to the specified file and location.
Step 3
The tutorial is complete!
The file has been successfully exported.
See the Export page for information on exporting to any of the other file types.

