Export Template
Contents
Description
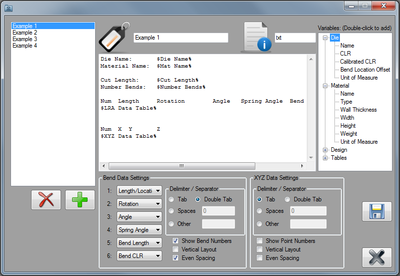
The export template plug-in allows part information to be exported to a text file with custom formatting. Four default/example templates will be included with the plug-in.These kinds of files can include die attributes, material characteristics, design information, an XYZ coordinate table, and/or an LRA data table. Files can also be given custom file extensions.
How To
Start Up
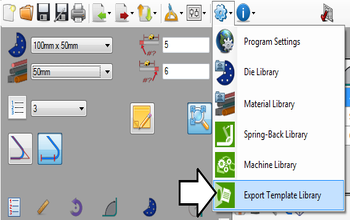
To access the export template library, click settings on the main menu bar. Click the export template option in the drop down menu.
Add Template
To add a template to the export template library, click the add button ![]() below the template list on the left side of the window.
below the template list on the left side of the window.
Once the add button is clicked the fields will be cleared and template formatting can be added.
Edit Template
To edit a template, first click on the template's name in the template list on the left side of the window to select it. Once selected, the template name will be highlighted in blue and the templates design will be displayed to the right. While a template is selected, it can be edited using the editing functions.
Template Name, Extension, and Design Area
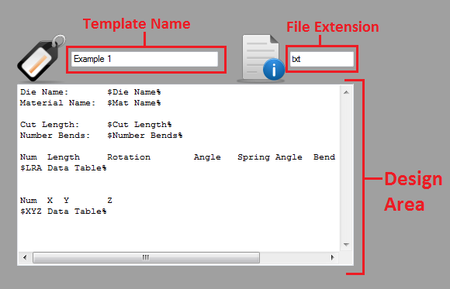
- Template Name: The name given to the template will be shown in the field next to the name tag icon. To change the name of a template, select the template in the template list and enter a new name into this field.
- File Extension: The file extension that will be used for files exported using the current template. Examples: txt, dat, prg, etc.
- Design Area:
Variables
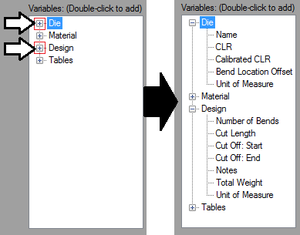
Variables are shown in the variable list on the right of the window. Part attribute and table variables are used as placeholders for the actual part information that will be included in the file.Variables are broken into four categories: Die, Material, Design, and Tables. Each section can be expanded to view the variables by clicking on the [+] next to the category name. Click the [-] to collapse the section again. See image to the right.
To add a variable to the template, double click on the variable in the variable list. The variable will be placed at the current cursor location in the template design area. Each variable will be surrounded by a "$" and a "%". See the image below for an example. In the actual exported file, the die's name and CLR will be placed where the "$Die Name%" and "$Die CLR%" variables are.
Note: Only one of each table can be added to a single temple. For example, one LRA and one XYZ table can be added, but not two LRA tables.
Be sure to keep these symbols in place as the variable will not appear in the final exported file if either of them are removed accidentally.
Bend Data Settings
XYZ Data Settings
Delete Template
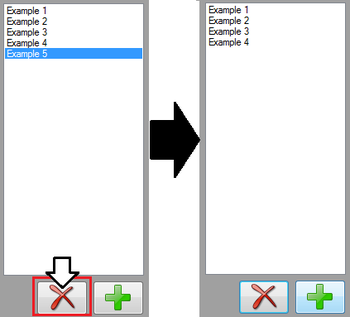
To delete a template from the export template library, first select the template to delete by clicking on it in the template list. Once selected, the template name will be highlighted in blue. Click the delete button ![]() to remove it.
to remove it.
