Difference between revisions of "Template Rotation Tutorial"
(Created page with "==Introduction== This tutorial will step through the process of adding a rotation to a template with the template rotation plug-in. The template rotati...") |
|||
| Line 30: | Line 30: | ||
[[File:temprot02.png|700px]] | [[File:temprot02.png|700px]] | ||
| + | |||
| + | |||
| + | |||
| + | |||
| + | |||
| + | |||
| + | ==='''Step 3'''=== | ||
| + | '''The tutorial is complete!''' | ||
| + | |||
| + | Rotations applied to the template design will be included in the '''results table at the top of the window'''. | ||
| + | |||
| + | [[File:temprot03.png|700px]] | ||
Revision as of 10:09, 12 July 2013
Introduction
This tutorial will step through the process of adding a rotation to a template with the template rotation plug-in.
The template rotation plug-in allows rotations to be added to parts created using the template designer.
Tutorial
Note
Before starting the tutorial, a part must be created. This tutorial will be using the part that was created in the Template Designer Tutorial. Please complete the Template Designer tutorial before proceeding.
Step 1
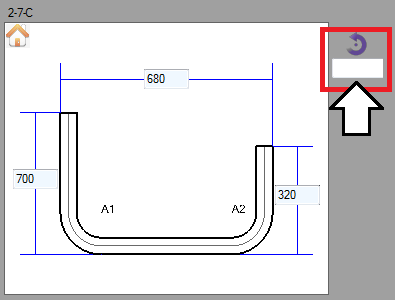
Once the part is complete, locate the rotation field next to the entry fields on the left side of the screen, as shown below. Since this part has only 2 bends, there will only be one rotation field available.
Step 2
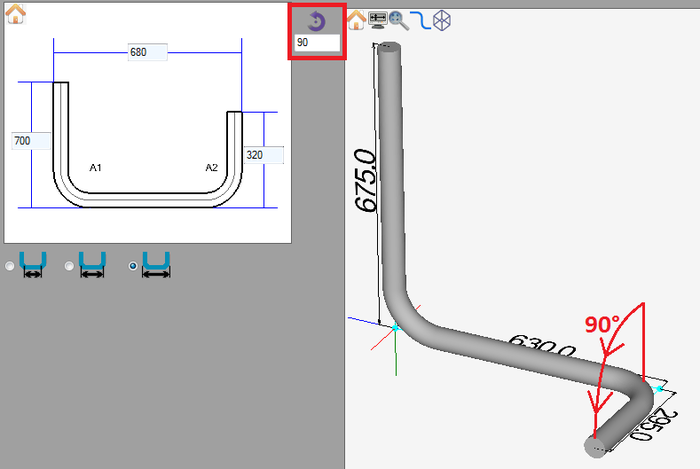
Next, a rotation value will be applied to the part.
Enter "90" in the rotation field. This will add a rotation to the second bend on the part. See the image below.
Step 3
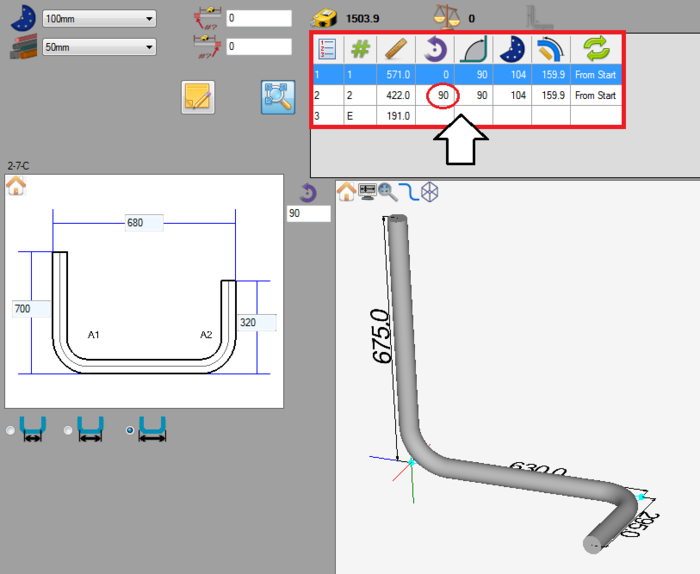
The tutorial is complete!
Rotations applied to the template design will be included in the results table at the top of the window.


