Difference between revisions of "Spring-back Charts"
| (2 intermediate revisions by the same user not shown) | |||
| Line 17: | Line 17: | ||
'''To access the spring-back charts''', click on the settings menu on the main tool bar. Click on the spring-back library option, as shown below. | '''To access the spring-back charts''', click on the settings menu on the main tool bar. Click on the spring-back library option, as shown below. | ||
| − | [[File:springback1.png| | + | [[File:springback1.png|500px]] |
| Line 59: | Line 59: | ||
[[File:springback8.png|600px]] [[File:springback9.png|400px]] | [[File:springback8.png|600px]] [[File:springback9.png|400px]] | ||
| + | |||
| + | |||
| + | |||
| + | |||
| + | |||
| + | ===Help Videos=== | ||
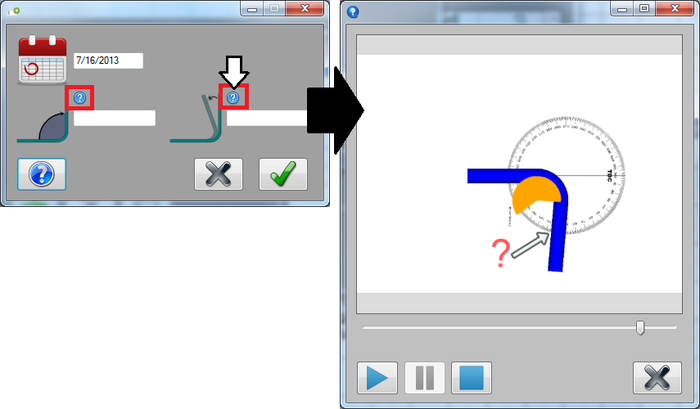
| + | [[File:springback10.png|right|350px]]In the bottom left corner of the add entry window, there will be a blue '''question mark''' button. [[File:diehelp2.png]] See image to the right. When this button is clicked, the attribute fields will have small '''help''' icons [[File:diehelp3.png]] displayed next to them. ''(To hide the help icons, click the question mark button again.)'' | ||
| + | |||
| + | |||
| + | '''Click on any of these help icons to watch help videos''' that will visually explain these attributes. See image below. Use the play, pause and stop buttons in the bottom left corner of the window to control the video. Click the grey X button [[File:mathelp3.png]] to close the video. | ||
| + | |||
| + | [[File:springback11.png|700px]] | ||
Latest revision as of 13:28, 19 August 2013
Contents
Description
The spring-back charts plug-in allows each die to be given spring-back/overbend and achieved angles to create a full spring-back chart. When a die is given spring back entries, the spring angle values will be generated in the spring angle column in the results chart. As more and more spring-back entries are added to a die, the full spring-back chart will become much more accurate.
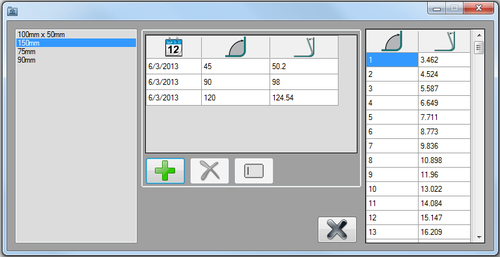
On the left side of the window, there is a list of all the dies in the die library. In the middle of the window, there is a chart of the spring-back values that the currently selected die has been tested for. The add, delete, and edit entry buttons are located below this chart. On the far right of the window, there is a full spring-back chart. If there are no spring-back values for the currently selected die, this chart will not appear.
How To
Start Up
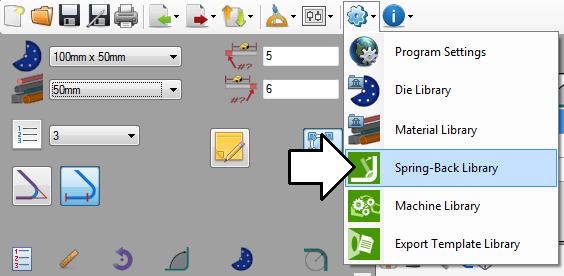
To access the spring-back charts, click on the settings menu on the main tool bar. Click on the spring-back library option, as shown below.
Add Entry
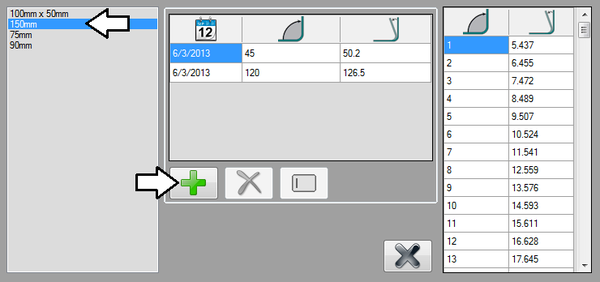
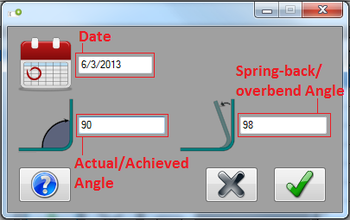
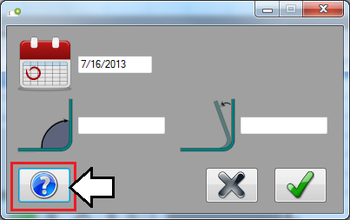
To add an entry to a die, first click on the die in the die list to the left. Then click on the add entry button. ![]() After that is clicked, another small window will open. In this window, the date, the measured bend angle, and the spring-back(overbend) angle ban be supplied. The measured bend angle is the actual angle that the part was bent to. The spring-back or overbend angle is the angle that the part needed to be bent to to achieved the measured angle. Once this information is entered, click the green check button to add it to the spring-back chart.
After that is clicked, another small window will open. In this window, the date, the measured bend angle, and the spring-back(overbend) angle ban be supplied. The measured bend angle is the actual angle that the part was bent to. The spring-back or overbend angle is the angle that the part needed to be bent to to achieved the measured angle. Once this information is entered, click the green check button to add it to the spring-back chart.
Delete Entry
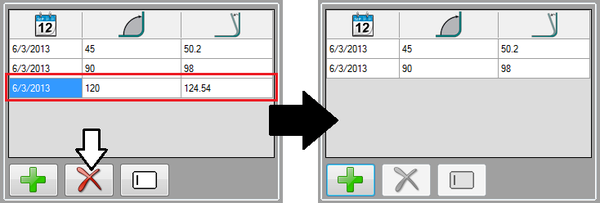
To delete an entry, first select the die that the entry will be deleted from. Select the entry in the entry chart by clicking in any cell in the entry's row. When a cell is selected, it will be highlighted in blue. Click on the delete button ![]() to remove it from the chart.
to remove it from the chart.
Edit Entry
To edit/change an entry's angle values, first select the die in the die list to the left. Select the entry in the entry chart by clicking in any cell in the entry's row. Once a cell is selected, it will be highlighted in blue. Click on the edit button. ![]() Once the edit button is clicked, the original entry menu will be opened. Edit any of the necessary information by changing the values in the given fields. Click the green check button to save the changes. To cancel editing and not save any changes, click the grey X button.
Once the edit button is clicked, the original entry menu will be opened. Edit any of the necessary information by changing the values in the given fields. Click the green check button to save the changes. To cancel editing and not save any changes, click the grey X button.
Full Chart
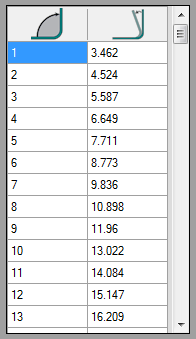
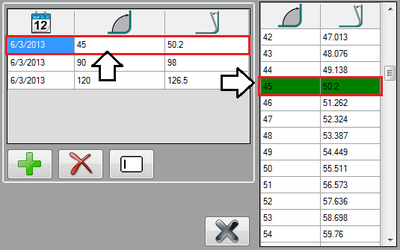
Once at least one entry is added to the die, the full spring back chart will be generated. This chart will have spring-back or overbend angles for angles from 1° to 180° for the current die. As more entries are added, the chart's accuracy will increase. The first column represents the actual bend angle and the second column represents the spring-back/overbend angle or angle that the bend must be bent to to achieve the actual angle.The angle values that were added to the entry chart will be highlighted in green, as shown below.
Caution: If the software detects any problems with the values that are generated, all or sections of the spring-back/overbend column will be highlighted in yellow. If this happens, please double check the entry values to ensure they are correct before proceeding.
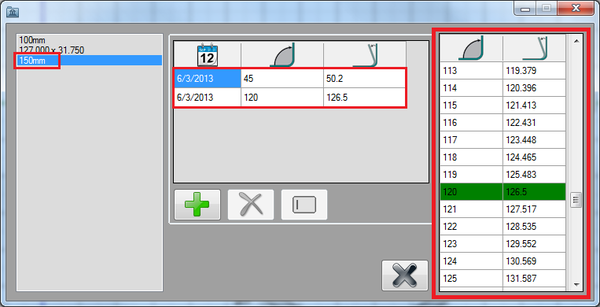
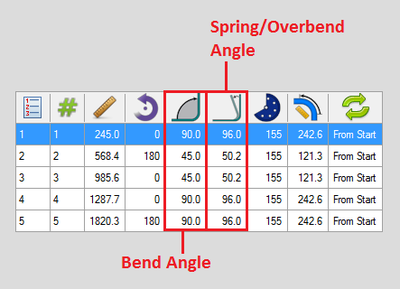
Once a die has been given spring back entries, the spring angle values will be automatically generated in the results chart for each bend. For example, in the image below, the 150mm die was given entries for both 45° and 120° which were used to generated the full spring back chart. When a part is created using this die, the results chart will give the spring angle (the angle that the bend needs to be bent to in order to get the bend angle) for each bend in the spring angle column.
Help Videos
In the bottom left corner of the add entry window, there will be a blue question mark button.
Click on any of these help icons to watch help videos that will visually explain these attributes. See image below. Use the play, pause and stop buttons in the bottom left corner of the window to control the video. Click the grey X button ![]() to close the video.
to close the video.
