Difference between revisions of "Multiple Dies/Radii"
| Line 32: | Line 32: | ||
| − | '''To change a bend's die in the harpoon or grapple designers''', first select a die by clicking on it in the bend list. Once selected, click the drop down menu below the bend list and select a die from the list. Once a die is selected, its center-line radius will be generated in the field below the die menu. | + | '''To change a bend's die in the [[Harpoon Designer|harpoon]] or [[Grapple Designer|grapple]] designers''', first select a die by clicking on it in the bend list. Once selected, click the drop down menu below the bend list and select a die from the list. Once a die is selected, its center-line radius will be generated in the field below the die menu. |
[[File:multidie3.png|300px]] | [[File:multidie3.png|300px]] | ||
Latest revision as of 13:32, 18 June 2013
Description
The Multiple Dies/Radii plug-in allows different dies to be applied to individual bends. This function gives the ability to create parts using more than one die.
How To
Change Individual Dies
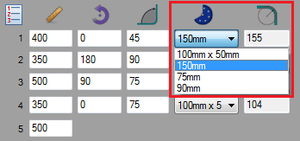
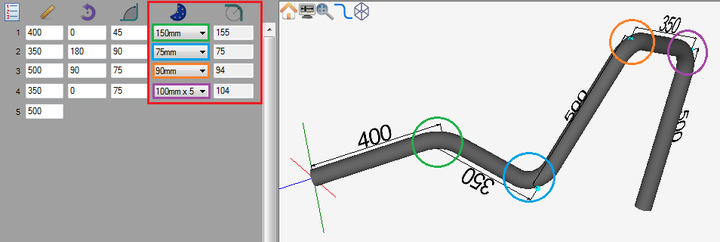
Next to the designer entry fields, each bend will be have a die selection menu where a die can be chosen. In the column to the right of these menus, there will be a column that displays the center-line radius of the chosen die.
To change a bend's die, click the die drop down menu in the bend's row. Every die available in the die library will be in this menu. Click on a die to select it for the bend. Once a die is selected, its center-line radius will be generated in the field to the right.
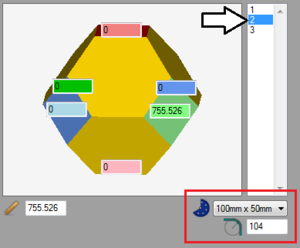
To change a bend's die in the harpoon or grapple designers, first select a die by clicking on it in the bend list. Once selected, click the drop down menu below the bend list and select a die from the list. Once a die is selected, its center-line radius will be generated in the field below the die menu.


