Difference between revisions of "Spring-back Charts Tutorial"
| Line 129: | Line 129: | ||
==='''Step 8'''=== | ==='''Step 8'''=== | ||
| − | Now, say the part was created, but '''each 45° bend was slightly off'''. When bending these bends to 49.2°, they resulted in 46° after spring back instead of the intended 45°. | + | Now, say the part was created using these spring angles, but '''each 45° bend was slightly off'''. When bending these bends to 49.2°, they resulted in 46° after spring back instead of the intended 45°. |
Revision as of 12:17, 16 July 2013
Contents
Introduction
This tutorial will step through the functions of the spring-back charts plug-in and the process of adding spring-back entries to the chart.
The spring-back charts plug-in is used to record the attempted and achieved bend angles for each individual die. Once at least 2 entries are added, a full chart of spring-back and achieved angles ranging from 1° to 180° will be generated.
Tutorial
Note
Before starting the tutorial, a part and a die must be created. This tutorial will be using the part that was created in the Linear 2D Designer Tutorial and the die that was created in the Die Library Tutorial. Please complete both the Linear 2D Designer and die library tutorials before proceeding.
Step 1
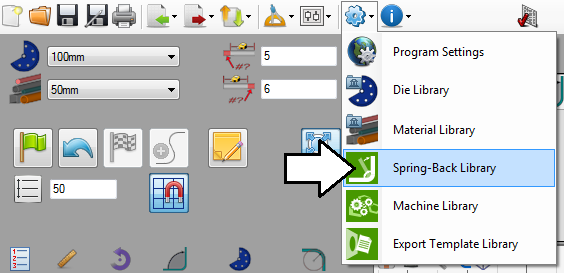
First, open the spring-back charts plug-in. Go up to the top of the window and click the settings menu. Select the spring-back charts option from the drop down menu.
Step 2
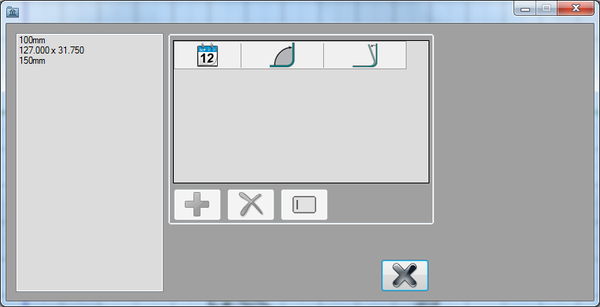
This will open the spring-back charts window. On the far right, there will be a list of each die. In the middle, spring-back entries can be added once a die is selected.
Step 3
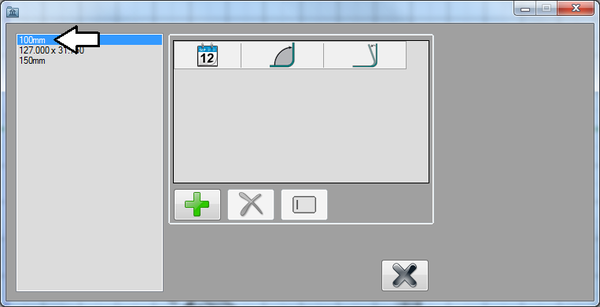
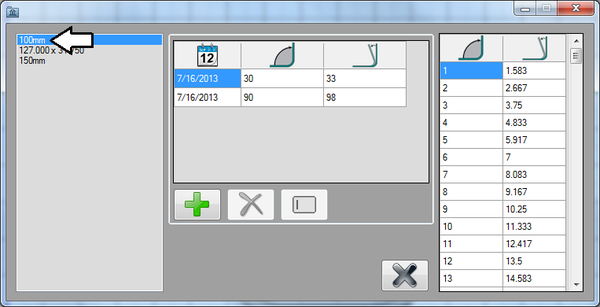
Click on the 100mm die (made in the Die Library Tutorial) in the die list to select it. This needs to be done before any spring back entries are added to the die.
Step 4
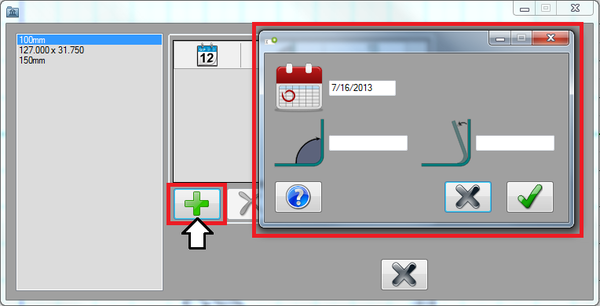
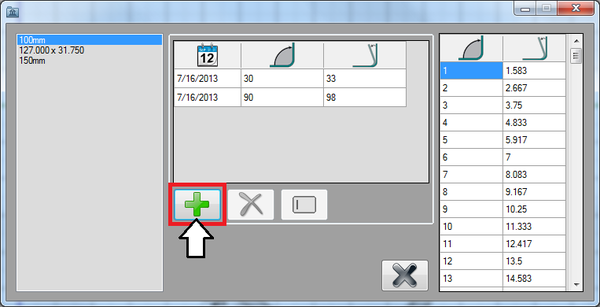
Now the first spring back entry will be added to the die. Click the add button. This will open the message box where spring back entries will be supplied.
In the achieved angle field, enter 90. In the spring/overbend angle field, enter 98. This means that the when aiming to create a 90° bend with the current die, the bend had to be bent to 98° to compensate for the spring back. After these two values are provided, click the green check button to add the entry to the chart.
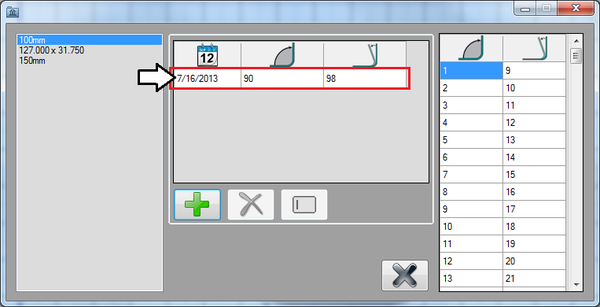
The angle values and current date will be added to the chart as shown below.
Step 5
Next, the second spring back entry will be added to the die. Again, click the add button. ![]()
In the message box, enter 30 into the achieved angle field. In the spring/overbend angle field, enter 33. Then click the green check button to add the entry.
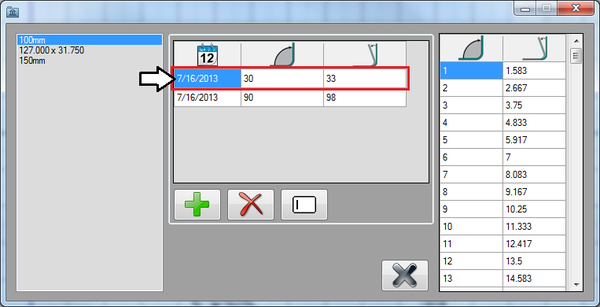
The entry will be added to the chart as shown below.
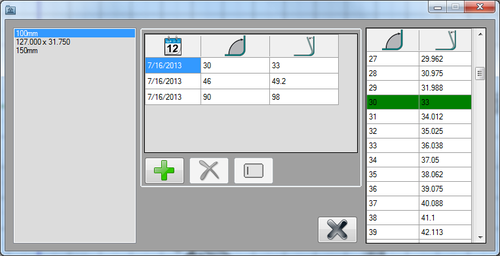
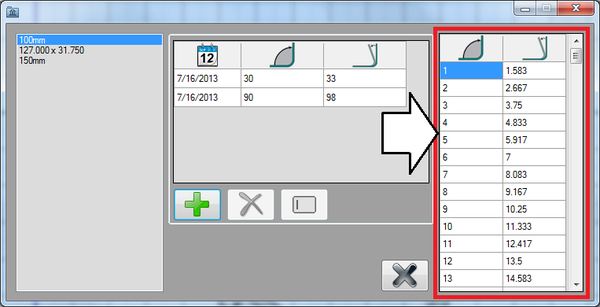
See the full chart to the left. The chart will range from 1° to 180°. These spring back values will be used to determine the spring angle for each bend in the results chart.
Step 6
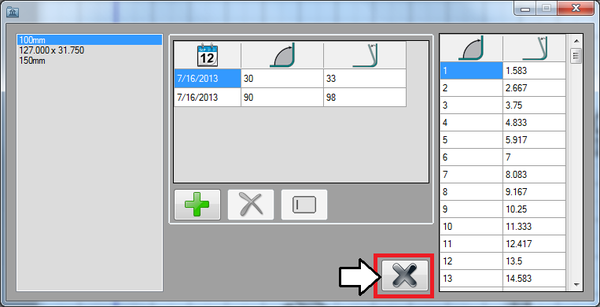
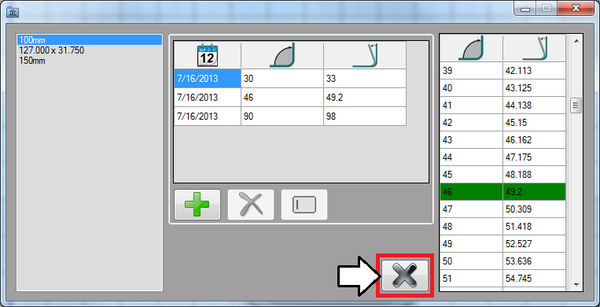
Now, close the spring-back charts window. Click the close button as shown below.
Step 7
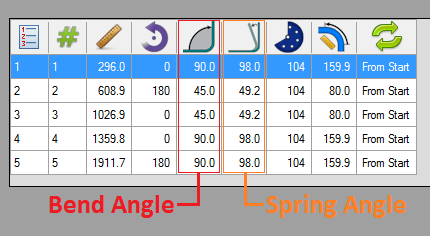
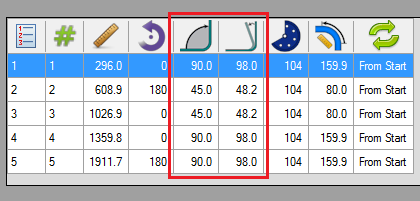
Go to the top of the designer window and see how each bend angle is given a spring angle in the results chart. For example, all 90° bends have a spring angle of 98°. This means that each 90° bend needs to be bent all the way to 98° so once spring back occurs and the bend re-opens a bit, the bend will become 90°.
Step 8
Now, say the part was created using these spring angles, but each 45° bend was slightly off. When bending these bends to 49.2°, they resulted in 46° after spring back instead of the intended 45°.
To address this issue, another spring-back entry will be added to the chart. Open the spring-back charts plug-in again.
Step 9
In the spring-back charts window, select the 100mm die again.
Step 10
Click the add button. This will open the message box where the new spring back entry will be supplied.
Enter 46 into the achieved angle field and enter 49.2 into the spring/overbend angle field. After the angle values are entered, click the green check button.
Step 11
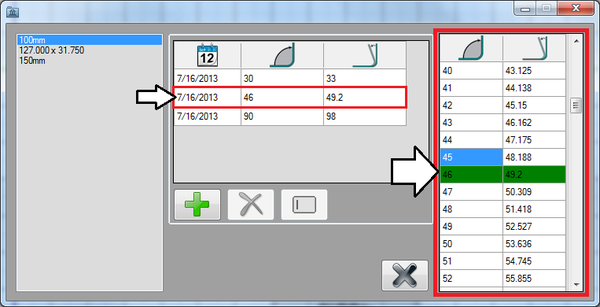
The new entry will be added to the chart as shown below. Notice how the spring angle for 45° bends is adjusted in the full chart to the left.
Now, close the spring-back charts window. Click the close button as shown below.
Step 12
Go back up to the top of the window and see the results chart. Each 45° bend will have a new spring angle that should be more accurate.
Step 13
The tutorial is complete!
See the Spring-back Charts plug-in page for more information on each function.
