Bend Order
Description
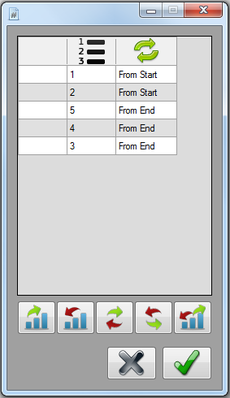
In the bend order menu, the order and orientation of the bends can be customized. The adjustments made here will be included on the print out/setup sheet for the part and in the results table at the top of the part designer window.
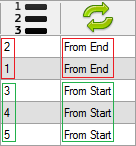
At the top of the window, there is a chart containing the current bend order and the orientation of each bend. Below the chart, there will be buttons that control the bend order and orientation.
How To
Start Up
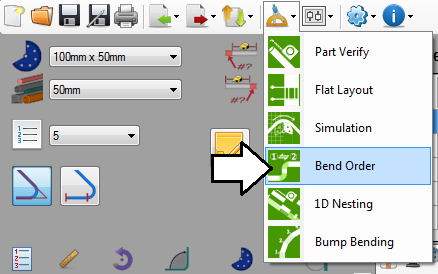
To access the bend order menu, click the tools menu on the main tool bar. Click the bend order option in the drop down menu, as shown below.
Change the Bending Order
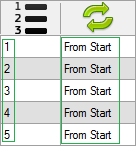
To set the bends to the normal bend order, click the normal bend order button. ![]() The bending process will start at the first bend and end at the last bend. Each bend will be bent starting at the beginning/start of the bend.
The bending process will start at the first bend and end at the last bend. Each bend will be bent starting at the beginning/start of the bend.
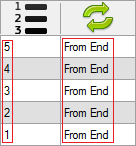
To set the bends to the completely reversed order, click the reverse bend order button. ![]() The bending process will start with the last bend and end with the first. Each bend will be bent starting from the end of the bend.
The bending process will start with the last bend and end with the first. Each bend will be bent starting from the end of the bend.
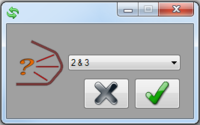
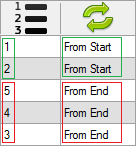
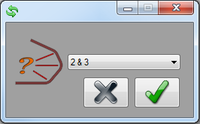
To flip the bending order and orientation between two bends, click the normal flip button. ![]() Once that's clicked, a message box will appear. Click the drop down menu and choose which bends the flip will occur between. Click the green check button to confirm. This will cause the bend order to completely flip between the specified bends. For example, if '2&3' is chosen, the bend order will go in normal order and bend from the start of the bend up to the third bend. After bend three, the order goes in reverse order and the bend's are bent from the end of the bend.
Once that's clicked, a message box will appear. Click the drop down menu and choose which bends the flip will occur between. Click the green check button to confirm. This will cause the bend order to completely flip between the specified bends. For example, if '2&3' is chosen, the bend order will go in normal order and bend from the start of the bend up to the third bend. After bend three, the order goes in reverse order and the bend's are bent from the end of the bend.
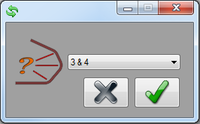
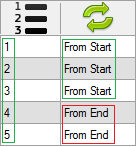
To flip the bend orientation between two bends, click the opposite flip button. ![]() Once that's clicked, a message box will appear. Click the drop down menu and choose which bends the flip will occur between. Click the green check button to confirm. This will cause the bend orientation to completely flip between the chosen bends. The bend order will remain normal, but the orientation will switch from 'From Start' to 'From End' between the bends. For example, if '3&4' is chosen, the bends will bend in normal order and bend from the start of the bend through bend three. From bend four to the end, the bends will bend from the end of the bend.
Once that's clicked, a message box will appear. Click the drop down menu and choose which bends the flip will occur between. Click the green check button to confirm. This will cause the bend orientation to completely flip between the chosen bends. The bend order will remain normal, but the orientation will switch from 'From Start' to 'From End' between the bends. For example, if '3&4' is chosen, the bends will bend in normal order and bend from the start of the bend through bend three. From bend four to the end, the bends will bend from the end of the bend.
To start the bend order at the center and work towards start/end, click the center out button. ![]() Once the button is clicked, a message box will appear. Click the drop down menu and choose which bends bend order will be split between. The bend order will go in reverse order starting between the two chosen bends working to the start of the part bending each bend from the end of the bend. After the first bend on the part is complete, the bend order will return to normal and work towards the end of the part bending each bend from the start of the bend.
Once the button is clicked, a message box will appear. Click the drop down menu and choose which bends bend order will be split between. The bend order will go in reverse order starting between the two chosen bends working to the start of the part bending each bend from the end of the bend. After the first bend on the part is complete, the bend order will return to normal and work towards the end of the part bending each bend from the start of the bend.
Save Order
Once the bend order has been adjusted to the proper order, click the green check button ![]() to save the order and close the window.
to save the order and close the window.
To exit without saving any of the bend order settings, click the exit button. ![]()
Note: If the simulation plug-in is included, changing the bend order here will also effect the bend order in the simulation window.
