Material Library Tutorial
Introduction
This tutorial will step through the process of creating and adding a material to the material library.
The units used throughout this tutorial will be millimeters.
Tutorial
Step 1


Step 2
Once the material library has been opened, a material can be added to it. Now click the add button ![]() located below the material list on the left side of the window.
located below the material list on the left side of the window.

Step 3
Once the add button has been clicked, the attribute fields to the right will be open to type in.
Fill in the fields with the information as shown below.

- Name: The name given here will be what the material is called everywhere in the software. For example, in the main material selection menu in any of the part designers. This material is given the name 50mm based on its diameter.
- Material Shape: The shape of the material can be chosen by clicking one of the shape options. Round, Square, and rectangular are available. Click the round option as shown above.
- Weight: The weight given here is how much the material weighs per unit. This value is optional. Since this material will not actually be used to create any parts and will only be used for tutorial purposes, no weight value is necessary. Enter 0 in the weight field.
- Color: The color of the material can be changed using the color button.
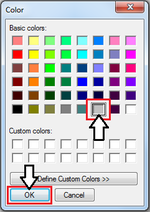
 Click this button to open the color selection menu, as shown to the right. Select a color by clicking on one of the basic color options. Click OK to confirm.

- Wall Thickness: The wall thickness is the width of the material wall. Enter 5 into the wall thickness field.
- Diameter: The diameter is measured straight across from the outside edges of the tube. Enter 50 into the diameter field.
Step 4
Once all the material attributes have been entered and the options have been chosen, the material can be saved and added to the material library.
To add the die, click the save button ![]() below the attribute fields.
below the attribute fields.

After saved is clicked, the material will appear in the material list to the left.

Step 5
The material has been successfully added to the material library!