Manufacture Checking Tutorial
Introduction
This tutorial will demonstrate how to use the manufacture checking plug-in.
The manufacture checking plug-in uses the die limitations/minimum distances applied to the die in the die library. If any of the limitations are not met in the part design, a warning will be displayed in the results chart. Essentially, this plug-in ensures there is enough material is before, between, and after bends.
Tutorial
Note
Before starting the tutorial, a die must be created. This tutorial will be using the die that was created in the Die Library Tutorial. Please complete the Die Library tutorial before proceeding.
Step 1
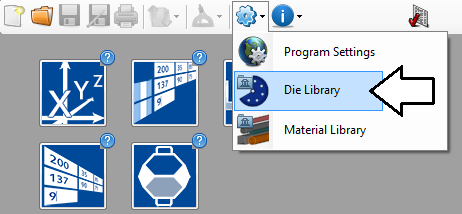
First, the die needs to be given some minimum distances. Go up to the main menu bar and click the Settings menu. Select the die library option from the drop down menu.
Step 2
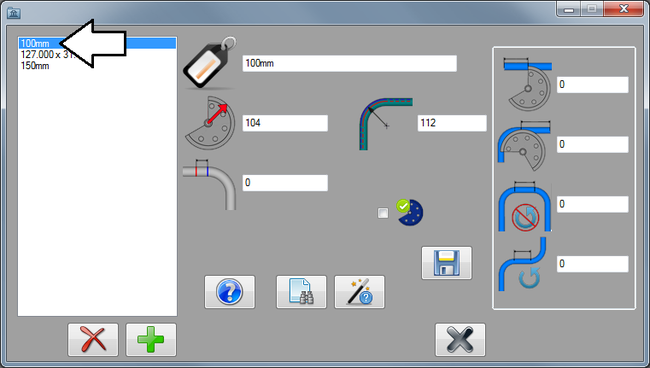
In the die library, click on the 100mm die in the die list to the left to select it.
Step 3
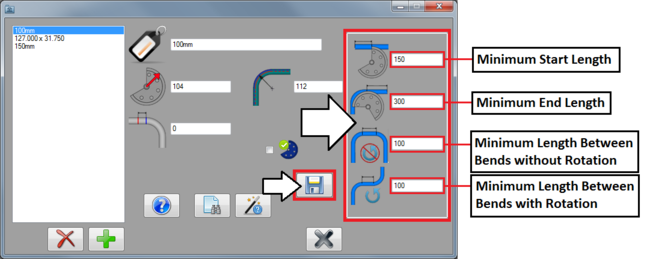
The die limitations/minimum distances are on the far right side of the window, as shown in the image below. The shortest amount of material allowed before, after, and between bends with and without rotations can be specified.
Enter "150" for the minimum start length, "300" for the minimum end length, "100" for the distance between bends without rotation, and "100" for the distance between bends with rotation. Once these are all properly entered, click the save button.


