Difference between revisions of "Template Designer Tutorial"
| Line 93: | Line 93: | ||
==='''Step 8'''=== | ==='''Step 8'''=== | ||
| − | '''The part is now complete!''' | + | '''The part is now complete!''' |
| + | |||
| + | |||
| + | [[File:temptut13.png|right]]If this were a real part design project, the '''part design file could be saved''' by going up to the main tool bar and clicking the '''save''' option. | ||
| + | |||
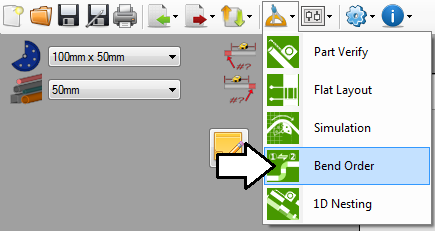
| + | [[File:temptut14.png|right]]The bend order can also be adjusted in the [[Bend Order|bend order]] menu. | ||
| + | |||
| + | [[File:temptut15.png|right]]The '''part setup sheet''' can also be printed by clicking the '''print''' option on the main tool bar. | ||
Revision as of 07:41, 24 June 2013
Contents
Introduction
This tutorial will step through the process of designing a part using the template designer interface.
While using the template designer, a basic part shape is chosen and the part is designed by providing the die, material, and dimension measurements.
Tutorial
Step 1
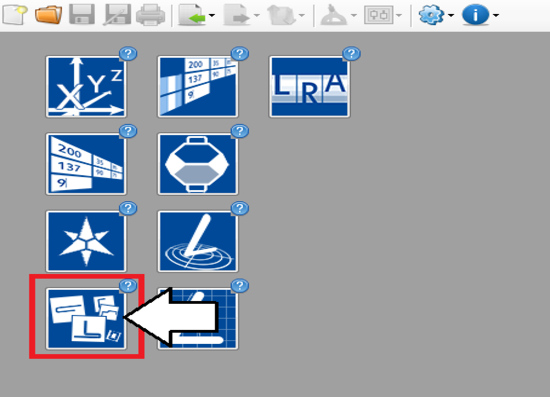
First, a new template design needs to be chosen and opened. On the start up page, click the template designer button. 
Step 2
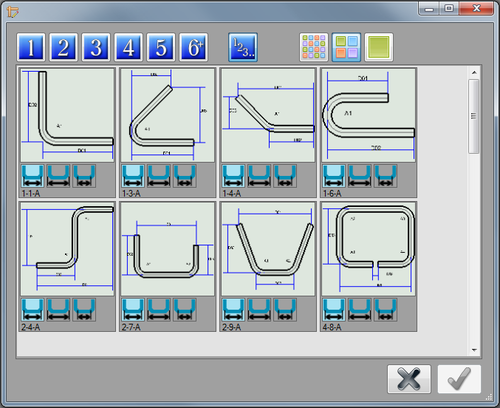
Once the template designer button is clicked, the template selection menu will be opened. In this tutorial, the basic templates will be used. First click the show all button ![]() so all the templates available can be seen. Then click the medium size tile button
so all the templates available can be seen. Then click the medium size tile button ![]() . The selection menu should look like the image shown below.
. The selection menu should look like the image shown below.
Step 3
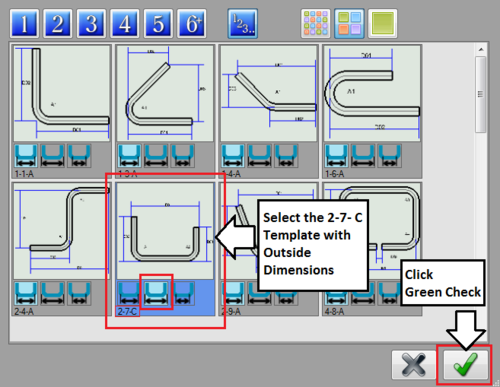
Now the template can be selected. For this tutorial, we will be using a basic template with two 90° bends. First select the template shown below (2-7-C) by clicking directly on the template image. The template option will be highlighted in blue.
Each of these templates have the option to change where the dimension locations are by using the dimension icons below each template. This tutorial will be using outside dimensions. Click the outside dimensions icon ![]() below the selected template. Once selected, the dimension icon will be highlighted in light blue.
below the selected template. Once selected, the dimension icon will be highlighted in light blue.
Click the green check button ![]() to confirm the template selection and continue.
to confirm the template selection and continue.
Step 4
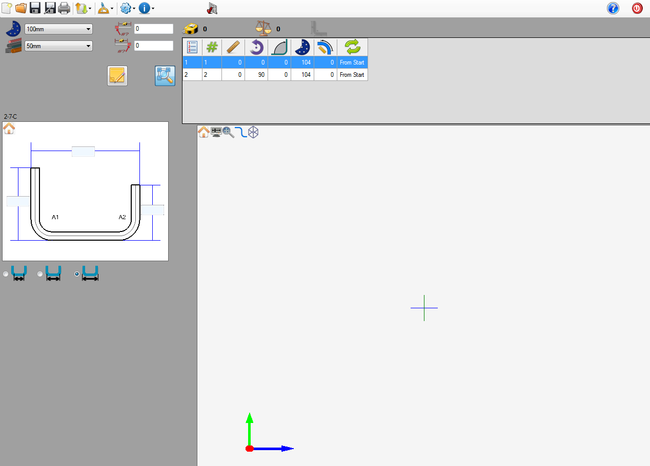
Now the new template designer window will be opened. This is where the part will be designed.
Step 5
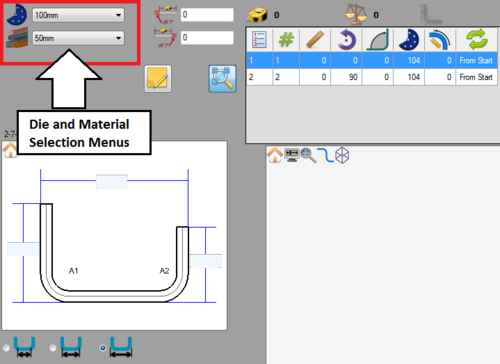
First of all, the die and material need to to be chosen. The die and material menus are located in the upper left corner of the designer window.Choose a die by clicking the drop down menu next to the die icon. Select the 100mm die from the list, as shown in the image below. (Note: This die was made in the Die Library Tutorial. If this die is not shown in the die selection menu, please complete the die library tutorial before proceeding.)
Choose a material by clicking the drop down menu next to the material icon. Select the 50mm material from the list, as shown in the image below. (Note: This material was made in the Material Library Tutorial. If this material is not shown in the material selection menu, please complete the material library tutorial before proceeding.)
Step 6
Now the part measurements/dimensions can be entered. Keep in mind that the dimensions are measured from the outside of the tube and extend to the apex of the bends.
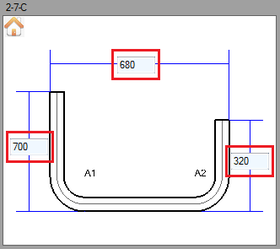
On the left side of the window, there will be a frame containing a 2D model of the part with the dimension lines and entry fields. This is where the measurements will be entered.
Enter 700 into the far left field, enter 680 into the upper middle field, and enter 320 into the right field. See image to the right.
Step 7
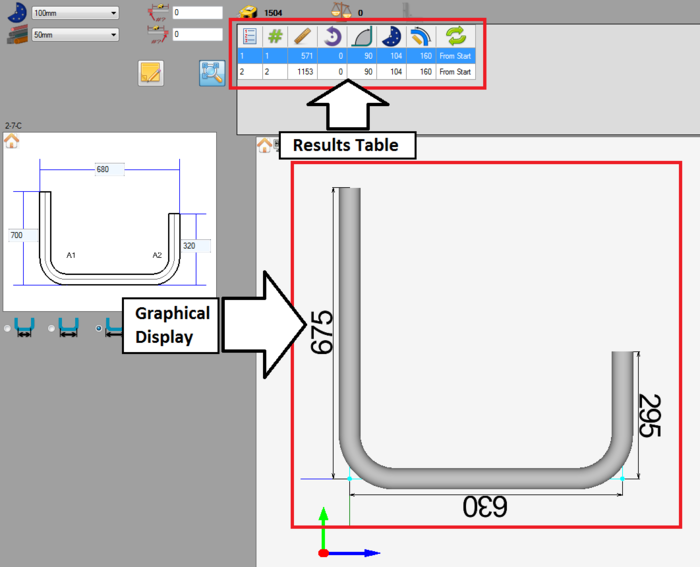
As each part dimension is given in the entry fields, the part model will be generated in the graphical display to the right. Once all three dimensions are entered, the complete part will be shown. The part's bend information will also be generated in the results table at the top of the window. See the image below.
Step 8
The part is now complete!
