Linear Advanced Designer Tutorial
Introduction
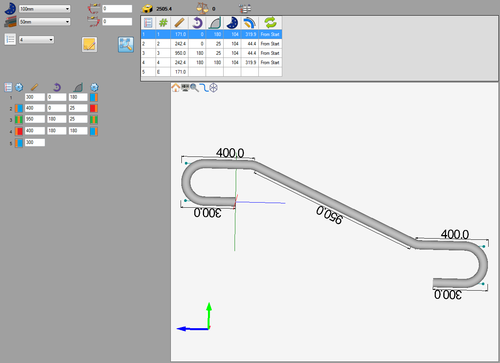
This tutorial will step through the process of of creating a part (Shown on the right) in the linear advanced designer interface.While designing in the linear advanced designer, the die, material, number of bends, and lengths, rotations, and angles are provided to determine the shape of the part. The type/placement of either end of each dimension can also be customized.
Note: This tutorial will use millimeters as the measurement units.
Tutorial
Step 1
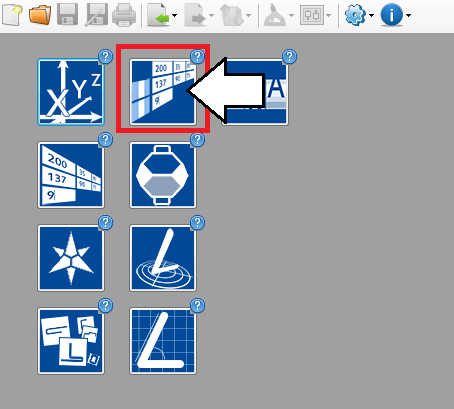
First, a new linear advanced part design needs to be started. On the start up page, click the Linear Advanced Designer button. 
Step 2
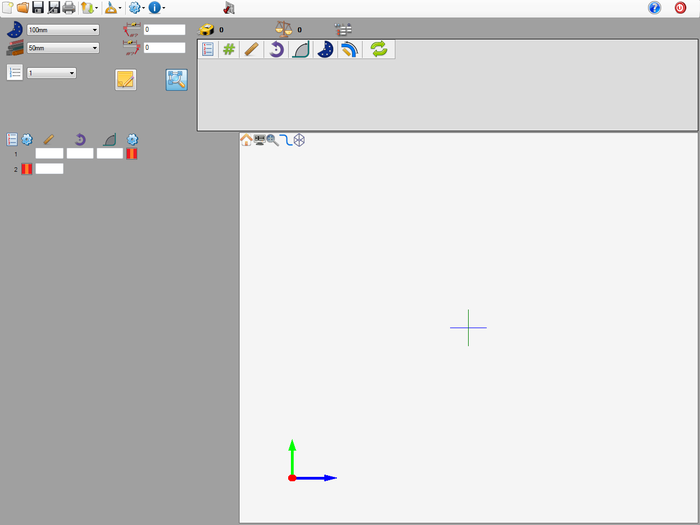
Now a new linear advanced part design window will open. This is where the part will be designed.
Step 3
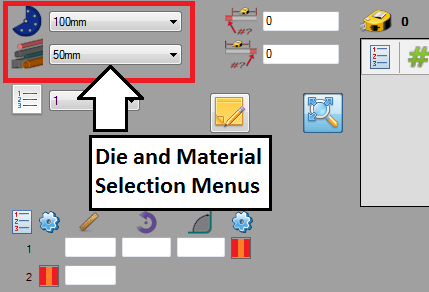
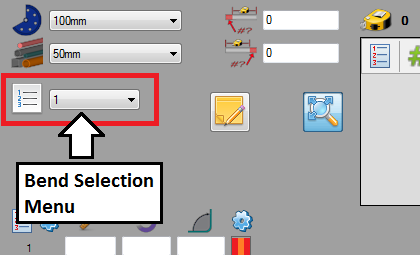
First of all, the die and material need to to be chosen. The die and material menus are located in the upper left corner of the designer window.
Choose a die by clicking the drop down menu next to the die icon. Select the 100mm die from the list, as shown in the image below. (Note: This die was made in the Die Library Tutorial. If this die is not shown in the die selection menu, please complete the die library tutorial before proceeding.)
Choose a material by clicking the drop down menu next to the material icon. Select the 50mm material from the list, as shown in the image below. (Note: This material was made in the Material Library Tutorial. If this material is not shown in the material selection menu, please complete the material library tutorial before proceeding.)
Step 4
Next, the number of bends in the part will be selected. The bend selection menu is located in the upper left corner just below the die and material menus. The part that will be created in this tutorial is going to have 4 bends.
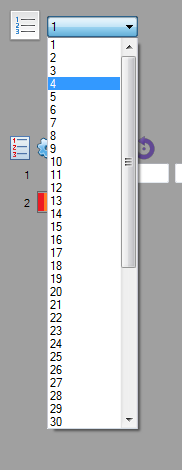
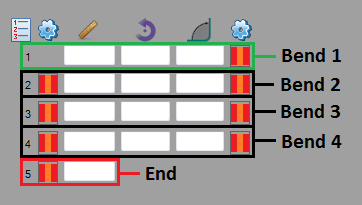
Choose the amount of bends by clicking the drop down menu next to the bend number icon. Select the number 4 from the list as shown in the image below. Once the number of bends has been increased to 4, the coordinate fields will adjust accordingly. There will be 5 rows available now.
Step 6
In the coordinate entry fields, there will be 5 rows and 3 columns. The first 4 rows will represent the length, rotation, and angle of each bend (Row 1 defines bend 1, Row 2 defines bend 2, etc.). The 5th row will be the length of the last length on the part.
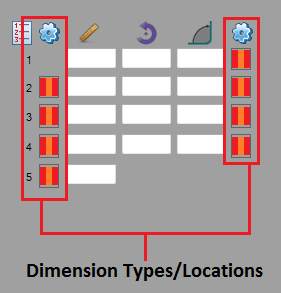
On either side of the entry fields, there will be columns of red and orange striped icons. These icons will be changed to modify the dimension locations on either side of each bend.
The first column of fields represents the length before the bend, the middle column represents the rotation, and the third column represents the angle of the bend.
