Bump Bending Tutorial
Contents
Introduction
This tutorial will step through the process of using the bump bending plug-in.
The bump bending plug in allows bends of larger radii to be sectioned off into multiple, equal sized, and equally distanced bends to simplify the bending process.
Tutorial
Step 1
First, a part with a large radius must be created. The linear 2D designer will be used to design the part.
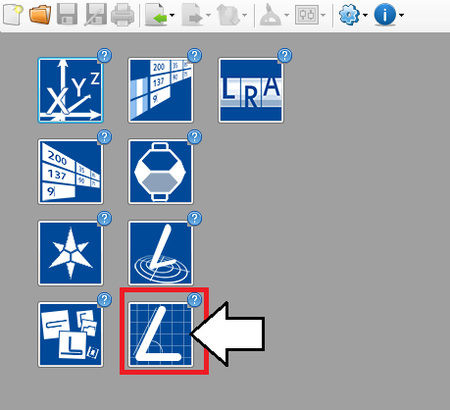
On the start up page, click the linear 2D designer button as shown below.
Step 2
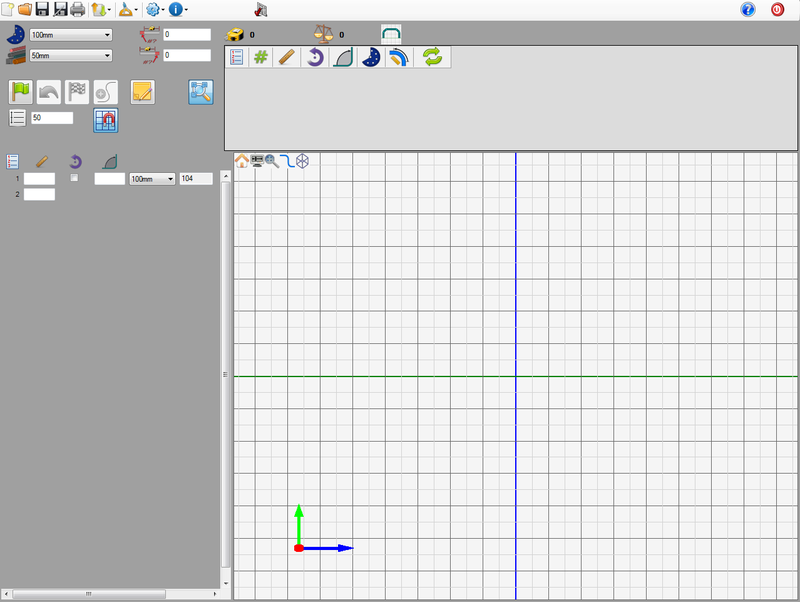
This will open a new linear 2D part design window.
Step 3
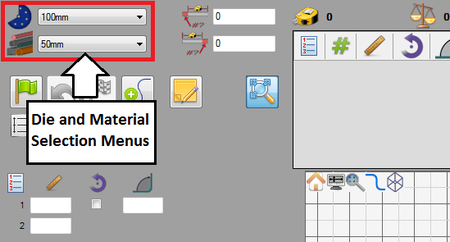
Now, the die and material need to to be chosen. The die and material menus are located in the upper left corner of the designer window.
Choose a die by clicking the drop down menu next to the die icon. Select the 100mm die from the list, as shown in the image below. (Note: This die was made in the Die Library Tutorial. If this die is not shown in the die selection menu, either complete the die library tutorial or just select any other die that is available.)
Choose a material by clicking the drop down menu next to the material icon. Select the 50mm material from the list, as shown in the image below. (Note: This material was made in the Material Library Tutorial. If this material is not shown in the material selection menu, either complete the material library tutorial or just select any other material that is available.)
Step 4
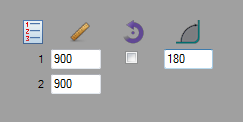
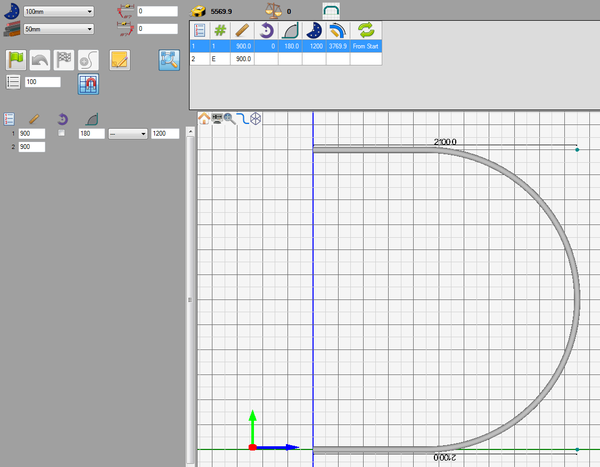
Now the large radius part will be designed. The part will have a single 180° bend with two equal sized lengths on either side.
In the entry fields on the left, enter the following coordinates:
Step 5
Next, a custom CLR will be applied to the bend.
In the die menu next to the bend angle, select the "---" option at the top of the drop down menu. Then enter 1200 into the CLR field.
Step 6
Now the part design is complete.
Step 7
Now the 1200 mm radius bend will be broken up into separate smaller bends using the bump bending plug-in.
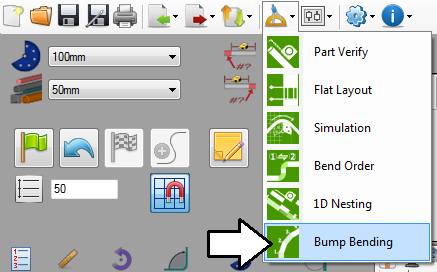
Go up to the main menu bar and click the tools menu. Select the bump bending option from the drop down menu.
Step 8
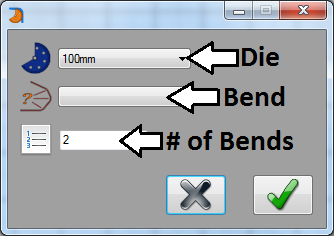
This will open a small window where the die, bend, and number of bends can be chosen and applied to the bend.
The die specifies which die will be used to bend each individual bump bend, the bend specifies which bend will be split up, and the number of bends specifies how many bump bends the large bend will be broken up into.
Step 9
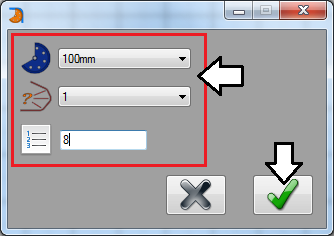
In the die menu, select the 100mm die (This die was made in the Die Library Tutorial. If this die is not shown in the die selection menu, either complete the die library tutorial or just select any other die that is available.). This die will be initially selected for each of these bends. After the bump bends are added, each can be given a different die if necessary.
In the bend menu, select bend 1.
And in the number of bend field, enter 8.
Click the green check button to apply.
Step 10
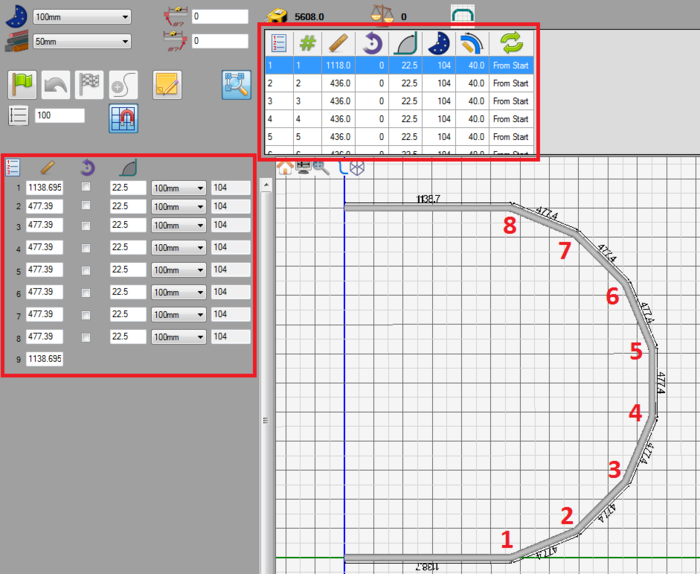
The large 180° bend with a 1200 mm radius will now be separated into eight different 22.5° bends where each is the same distance apart and bent with the 100mm die.
The entry fields and results table will be modified to include the bends that have been added to the part.
Step 11
The tutorial is complete!
For further information, see the Bump Bending plug-in page.
